
Publishing Your App to Google Play Store
This guide walks you through the complete process of publishing your app to the Google Play Store — from generating your signing credentials inside AI Studio, to submitting your app for review. No technical background is required.
Overview
Publishing an Android app to Google Play involves three stages:
| Stage | Where It Happens | Who Does It |
|---|---|---|
| Generate keystore & build your AAB | AI Studio | You (guided below) |
| Set up your app on Google Play Console | Google Play Console | You (guided below) |
| Upload & submit for review | Google Play Console | You (guided below) |
Before You Begin
Make sure you have the following ready before starting. Gathering these upfront will prevent delays during the submission process.
Account Requirements
- › A Google account (personal or business)
- › A one-time Google Play Developer registration fee of $25 USD (see Google Play docs)
- › If registering as an organisation: a DUNS number (see details below — can take up to 30 days to obtain)
App Content
- › Your app's name (up to 30 characters)
- › A short description (up to 80 characters)
- › A full description of your app (up to 4,000 characters)
- › Your app's category (e.g., Business, Education, Productivity)
- › A hosted Privacy Policy URL (required for all apps)
Visual Assets
- › App icon — 512 × 512 px, PNG (32-bit with alpha), max 1 MB
- › Feature graphic — 1024 × 500 px, JPG or 24-bit PNG (no alpha)
- › At least 2 phone screenshots — JPEG or 24-bit PNG, min 320 px, max 3840 px on any side
Your AI Studio dashboard shows a "Before You Publish" checklist in the Download section. Use it to track what you still need.
Individual vs. Organisation Account
Before registering for a Google Play Developer account, decide whether you are publishing as an individual or as an organisation. This affects what information you need to provide.
What is a DUNS Number?
A DUNS number (Data Universal Numbering System) is a unique nine-digit identifier assigned to businesses by Dun & Bradstreet. Google requires it to verify that your organisation is a legitimate registered business.
Do I Need One?
- Publishing as an individual: No DUNS number required.
- Publishing under a company or business name: Yes, a DUNS number is mandatory.
How to Get a DUNS Number
- Visit Dun & Bradstreet's lookup tool to check whether your business already has one.
- If not, apply at dnb.com/duns-number/get-a-duns.html.
- The application is free of charge.
- Allow up to 30 business days for processing.
If you intend to register as an organisation, apply for your DUNS number well before you plan to publish. The 30-day processing window is the most common cause of delays for first-time publishers.
App Icon & Visual Asset Specifications
Google Play enforces strict size and format requirements. Assets that do not meet these specifications will be rejected.
Additional Assets (Optional)
| Asset | Dimensions | Format | When Required |
|---|---|---|---|
| TV Banner | 1280 × 720 px | JPEG or 24-bit PNG | Android TV only |
| Wear OS Screenshot | Min 384 × 384 px (1:1) | JPEG or 24-bit PNG | Wear OS only |
| Preview Video | YouTube URL | N/A | Optional |
Privacy Policy Requirements
A Privacy Policy is mandatory for all apps on Google Play, regardless of whether your app collects personal data.
What Your Privacy Policy Must Include
- What data your app collects (e.g., name, email, location, device information)
- How that data is used
- Whether data is shared with third parties, and who those parties are
- How users can request deletion of their data
- Contact information for privacy-related queries
Hosting Your Privacy Policy
Your Privacy Policy must be hosted at a publicly accessible URL (not a PDF or a document that requires login). Suitable options:
- A dedicated page on your company website (e.g.,
https://yourcompany.com/privacy-policy) - A free policy generator such as Termly or PrivacyPolicies.com
Paste your Privacy Policy URL into both the App Content section of Google Play Console and your app's store listing. Google checks that the URL is reachable at the time of review.
Part 1 — Generate Your Keystore in AI Studio
A keystore is a digital certificate that proves the app was published by you. AI Studio generates and securely stores this for you — you do not need any developer tools.
The Download option only appears after your app has been successfully built at least once. If you have not built your app yet, run a build first before continuing.
Follow these steps inside AI Studio:
- Log in to AI Studio.
- In the left sidebar, click "All Apps" and select your app.
- To open the version panel, do one of the following:
- Click the version indicator in the chat section, or
- Click the Preview button in the top navigation bar on the right side.
- The preview panel will open — select the version you want to download.
- Click either "Download AAB (Google Play)" or "Download APK (For Mobile Testing)" — both buttons check for a keystore. If none exists, the Generate Release Keystore dialog opens automatically before the build is queued.
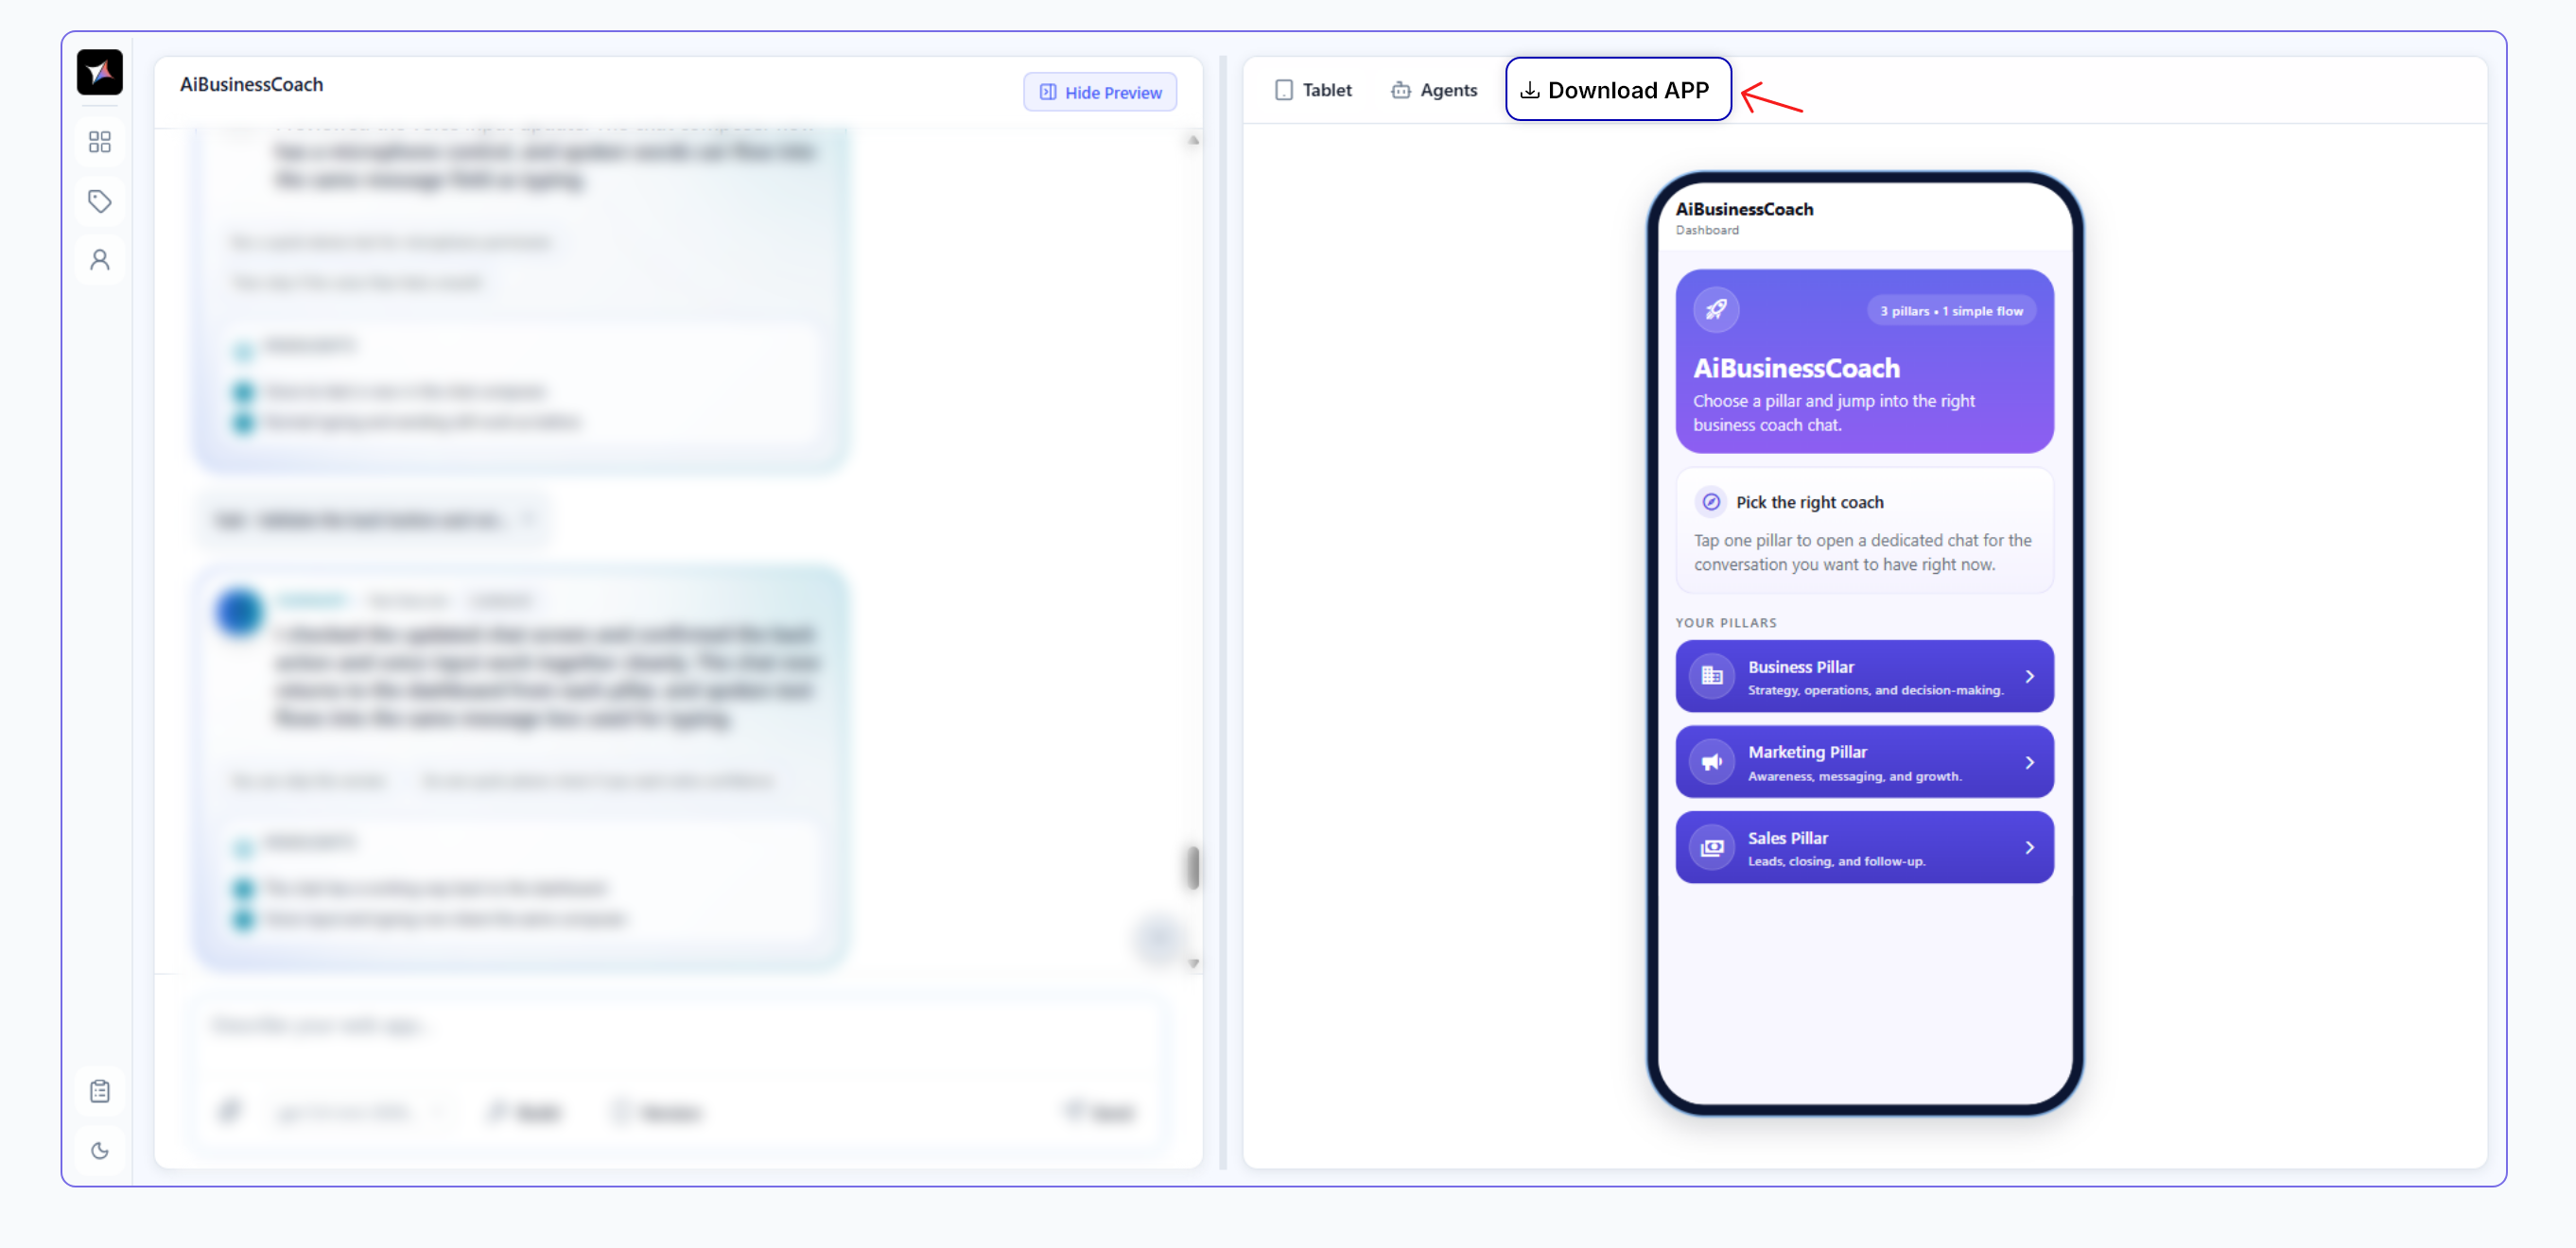 AI Studio — All Apps → app selected → Preview panel with Download App button
Fill in the following fields in the Generate Release Keystore dialog:
Once all fields are filled in, click "Generate Keystore". The system will take a few seconds to create your certificate.
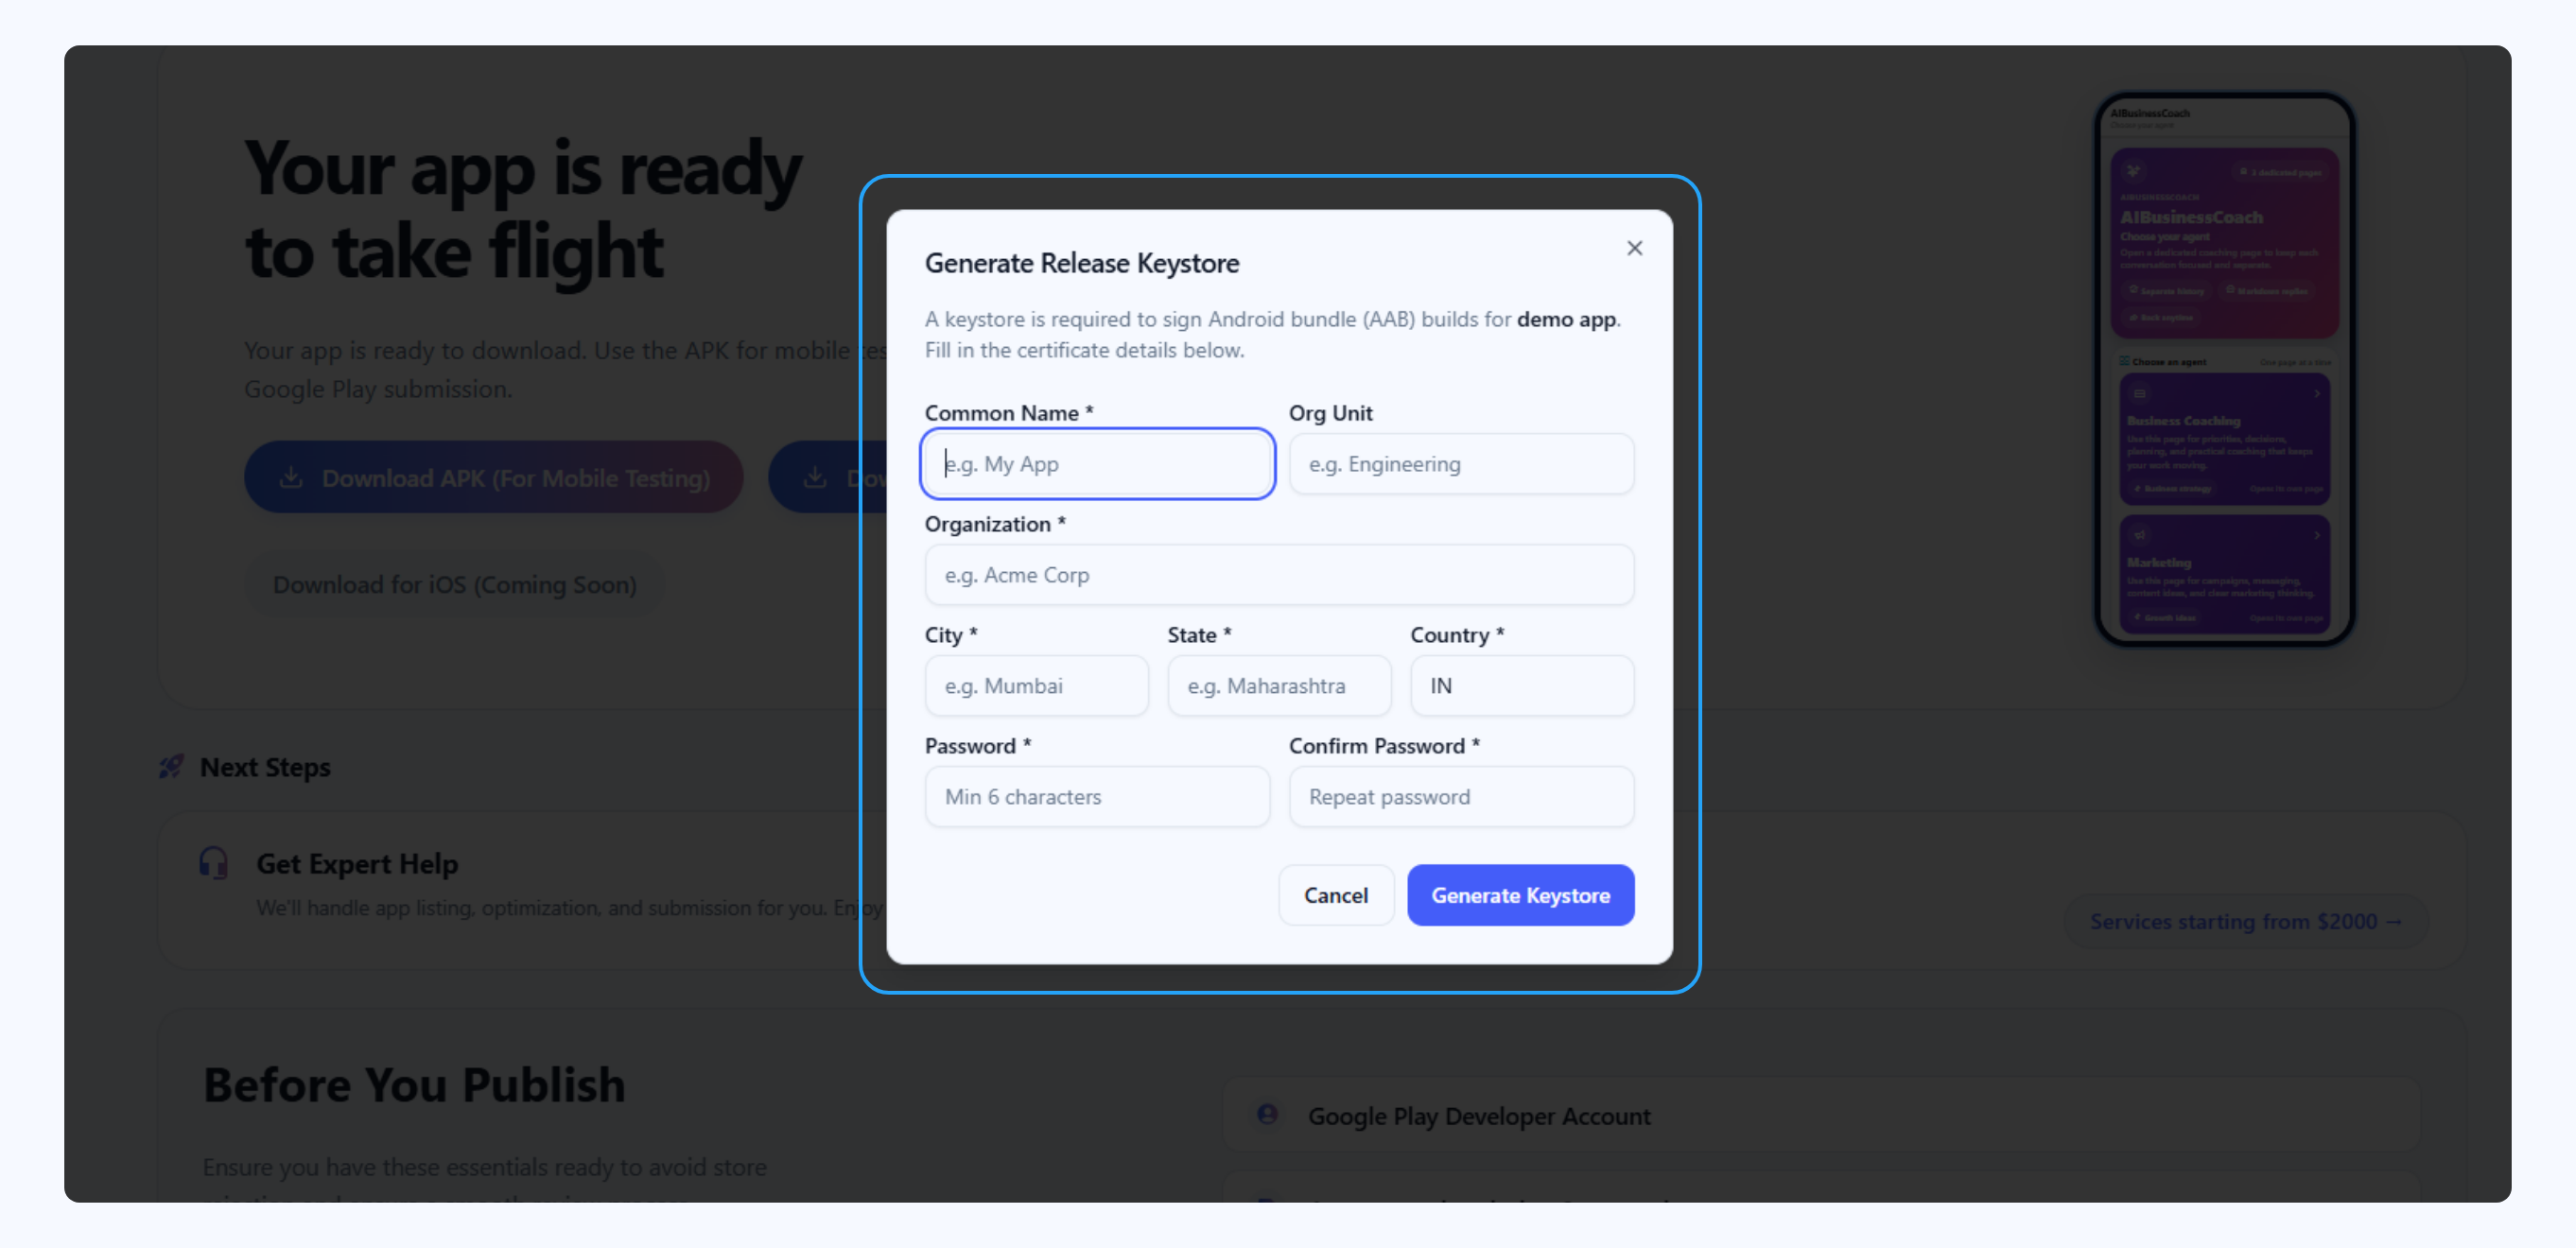 Generate Release Keystore modal — fill in Common Name, Organization, City, State, Country and Password
After clicking "Generate Keystore", AI Studio will automatically show a Save Your Fingerprints screen with two values:
| Fingerprint | Format | Where to Use |
|---|---|---|
| SHA-256 | AB:CD:12:34:... |
Google Play Console → App integrity → App signing |
| SHA-1 | AB:CD:12:34:... |
Firebase Console → Project Settings → SHA certificate fingerprints (required for Google Sign-In in your app) |
Copy both values using the Copy buttons in the dialog and store them in a password manager or secure document before clicking "I've saved my fingerprints — Continue".
If you lose them, contact our support team immediately — you will not be able to register your signing key with Google Play or Firebase without them.
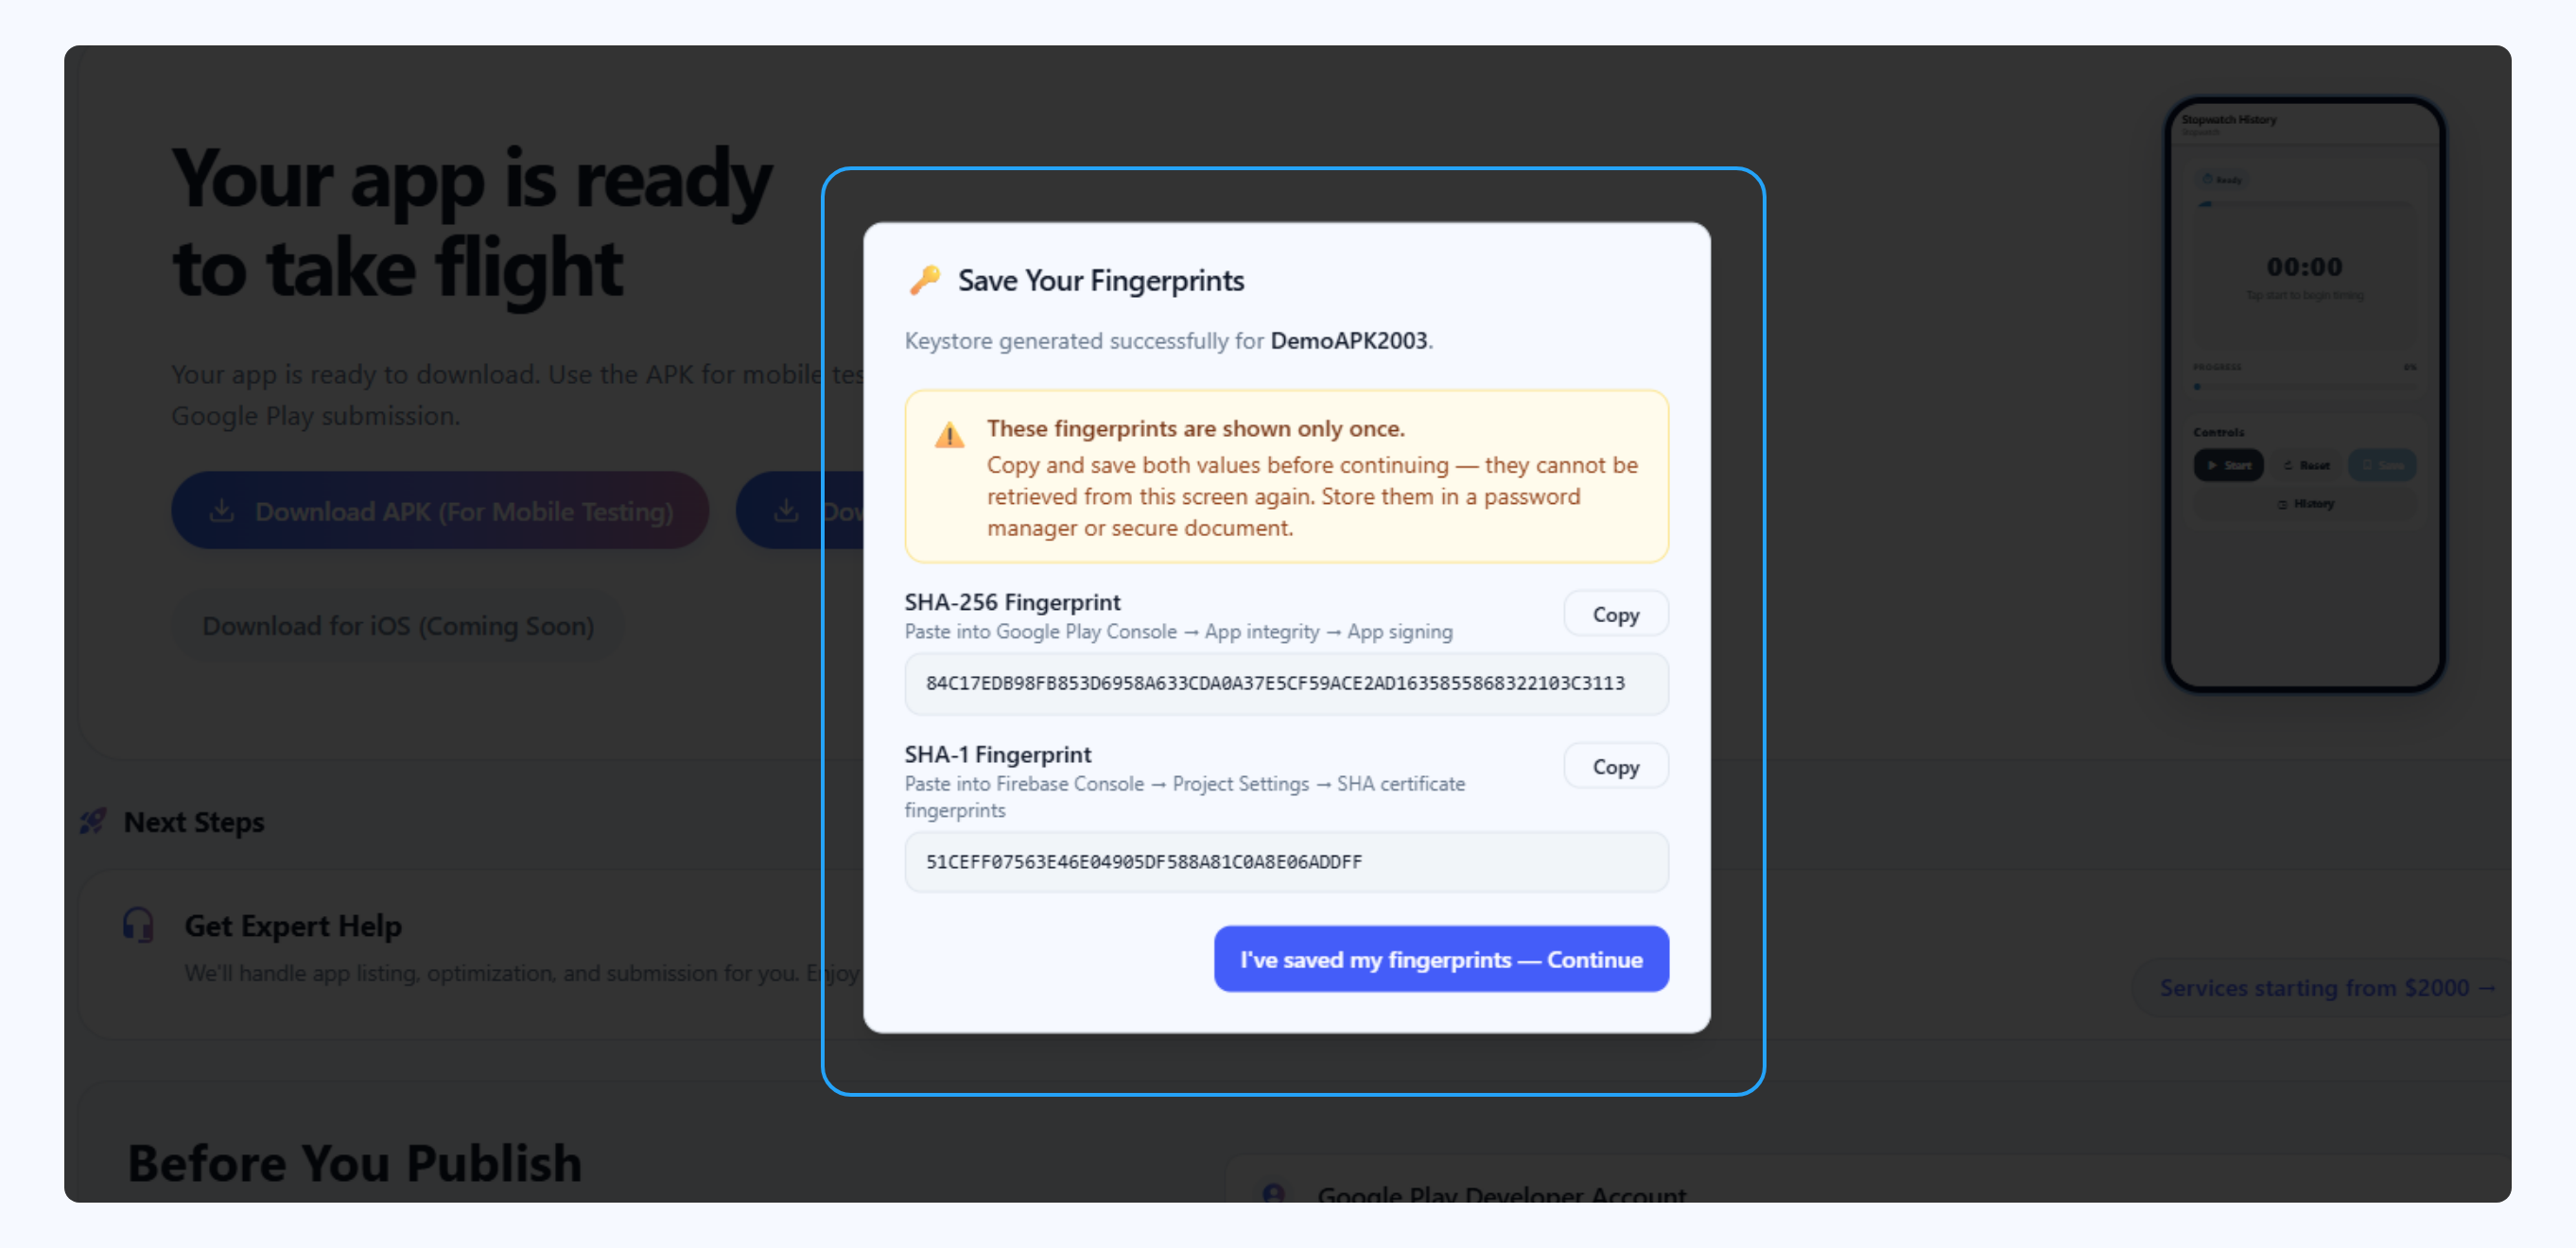 Save Your Fingerprints — copy both SHA-256 and SHA-1 before continuing (shown only once)
Recommended Test on a Real Device Before You Build for Google Play
Before generating your final AAB, download and test the APK on an actual Android device. This catches issues before Google's review process — saving you a 1–3 day review cycle.
📱 APK — For Testing
- Signed release build (
assembleRelease) - Installs directly on your device (sideload)
- Uses the same keystore as the AAB
- Cannot be uploaded to Google Play
🚀 AAB — For Google Play
- Signed release build (
bundleRelease) - Required format for Google Play upload
- Optimised per device by Play Store
- Covered in Part 2 below ↓
How to Download & Test the APK
- Log in to AI Studio and open your app from the left sidebar.
- Open the preview / download panel — click the version indicator in the chat section, or the Preview button in the top navigation bar.
- Select the version you want to test.
- Click "Download APK (For Mobile Testing)". A toast notification will appear: "APK build queued! You'll receive an email when your APK is ready."
- You will receive an email with a download link when ready — typically 5–15 minutes.
 Download panel — Download APK (For Mobile Testing) → Build Queued confirmation
- Download the
.apkfile from the email link. - Transfer it to your Android device (USB, Google Drive, WhatsApp, or email).
- Tap the file on your device to install. If prompted, enable "Install from unknown sources":
Android 8+: Settings → Apps → Special app access → Install unknown apps → select your browser or file manager → Allow.
Older Android: Settings → Security → Unknown sources → Enable.
Walk through every screen and feature before proceeding:
- › All screens load without crashes
- › Login and sign-up flows work correctly
- › AI chat and agent features respond as expected
- › Images, fonts, and icons display properly
- › Navigation between screens is smooth
Found a bug? Go back to AI Studio, fix it in the chat, rebuild, and re-test. Once everything looks right, scroll down to Part 2 to build the production AAB for Google Play.
Part 2 — Build Your Android App Bundle (AAB)
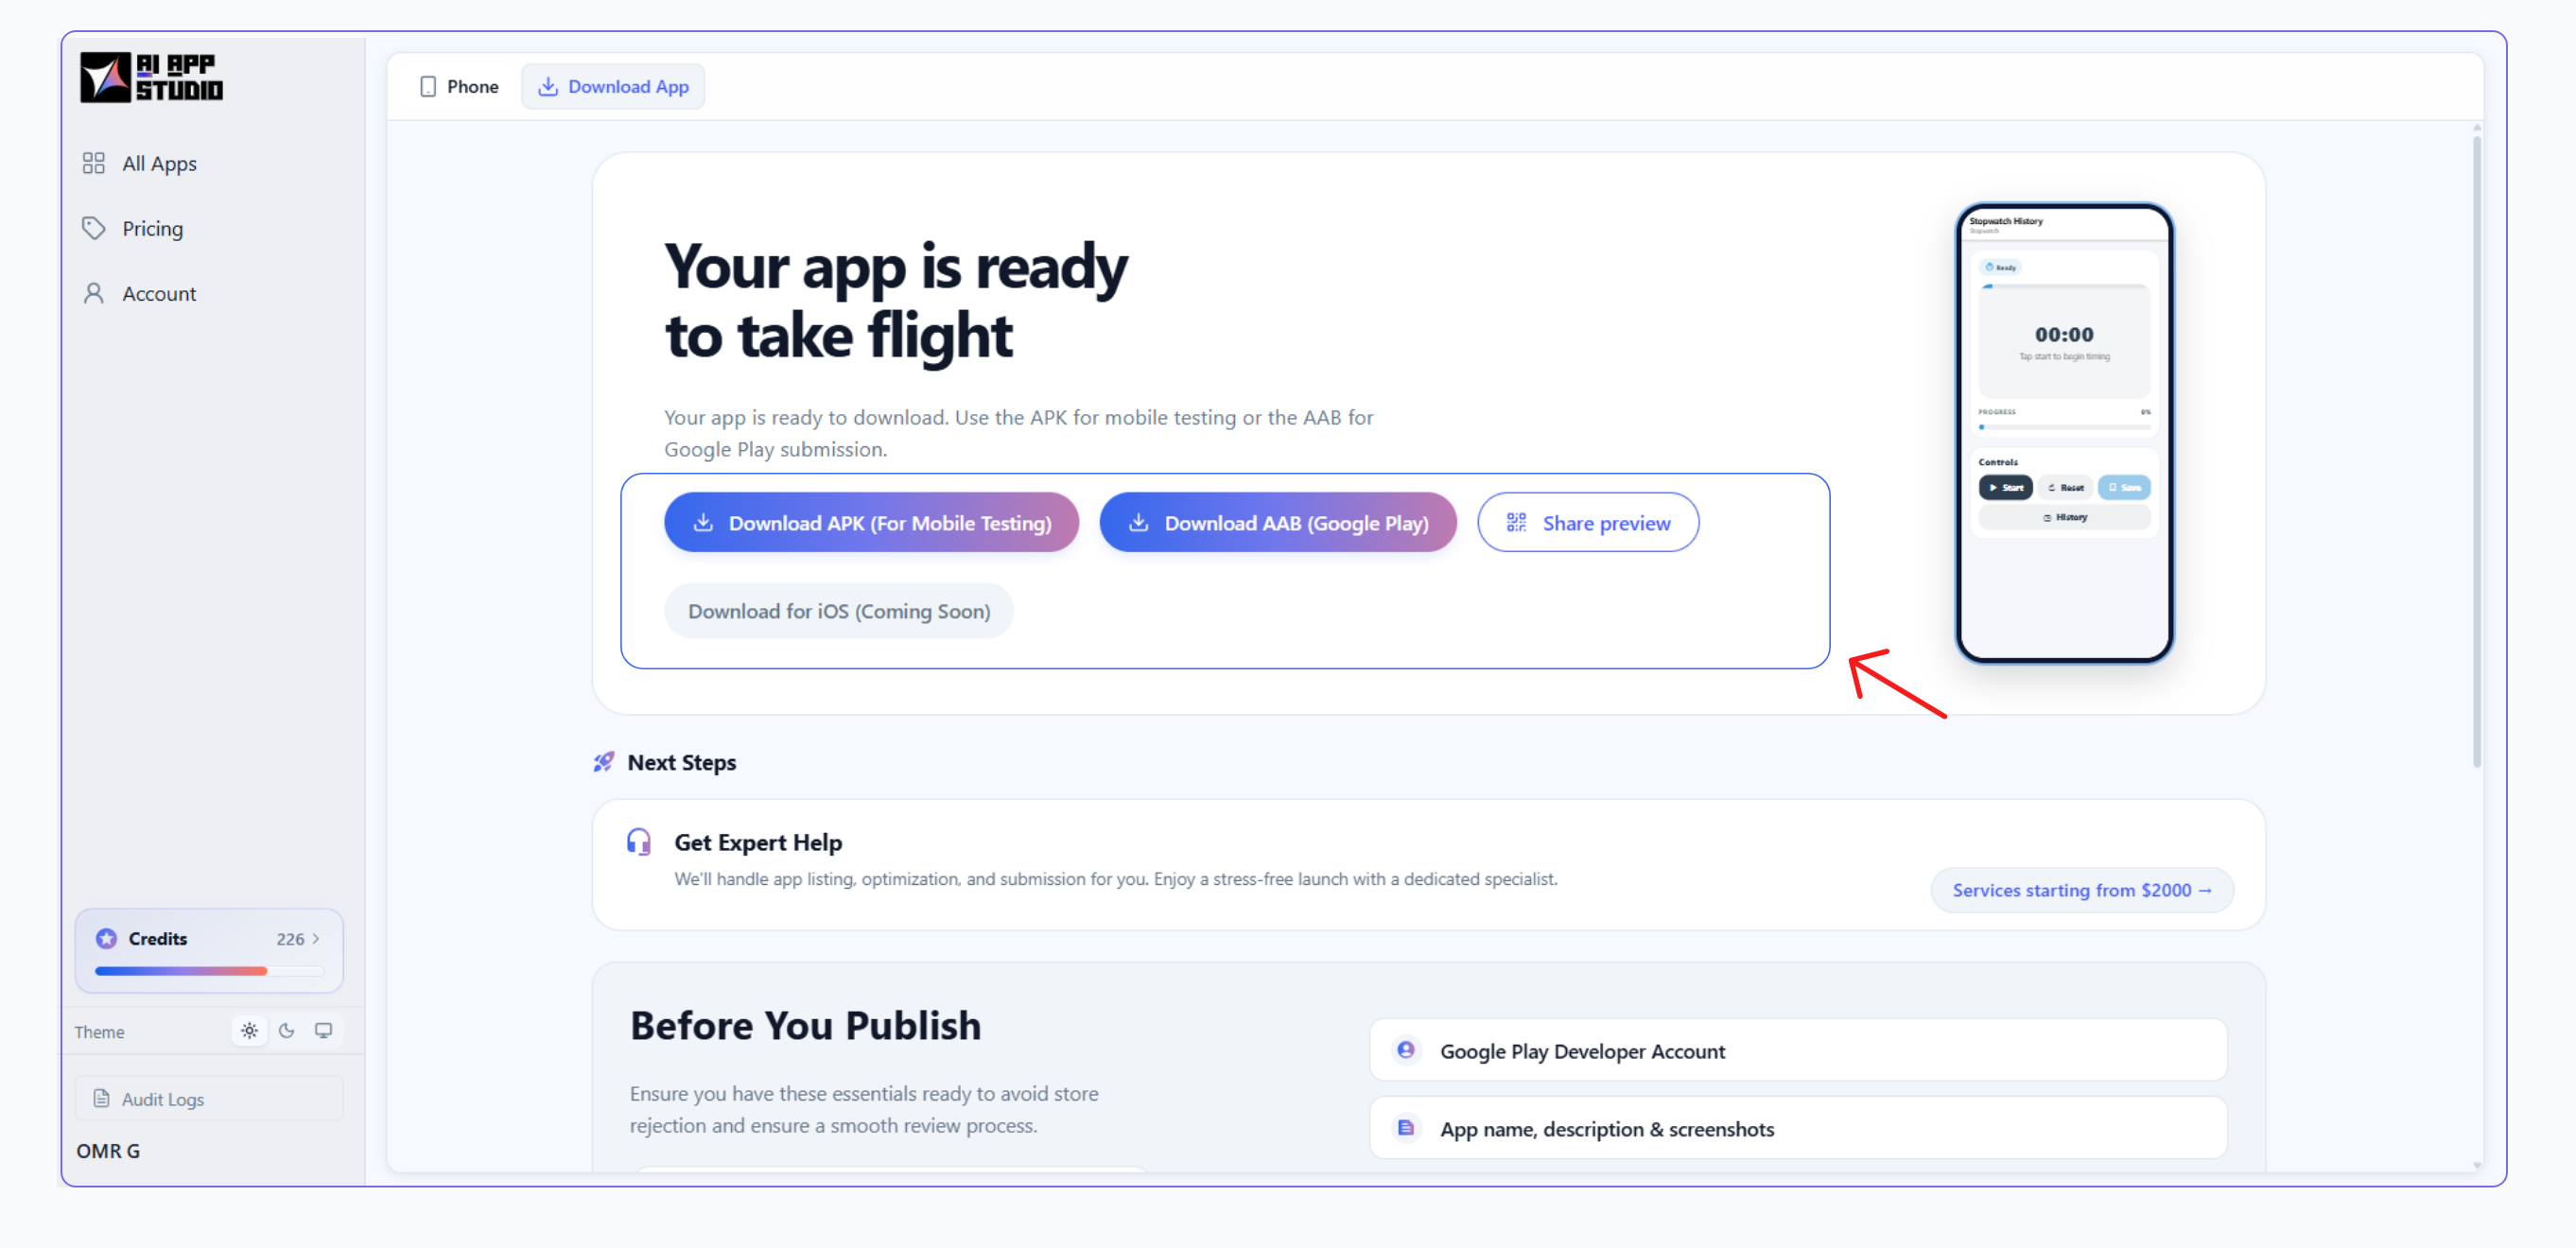
Once your keystore is in place, you are ready to build the production-ready version of your app — an Android App Bundle (.aab) file. This is the format Google Play requires for all new apps.
- Log in to AI Studio and open your app.
- Open the preview / download panel (version indicator in chat, or the Preview button in the top nav).
- Select the version you want to build.
- Click "Download AAB (Google Play)".
- Since your keystore is already provisioned, AI Studio will queue the bundle build immediately — no keystore dialog will appear.
A toast notification will appear: "AAB build queued! You'll receive an email when your AAB is ready."
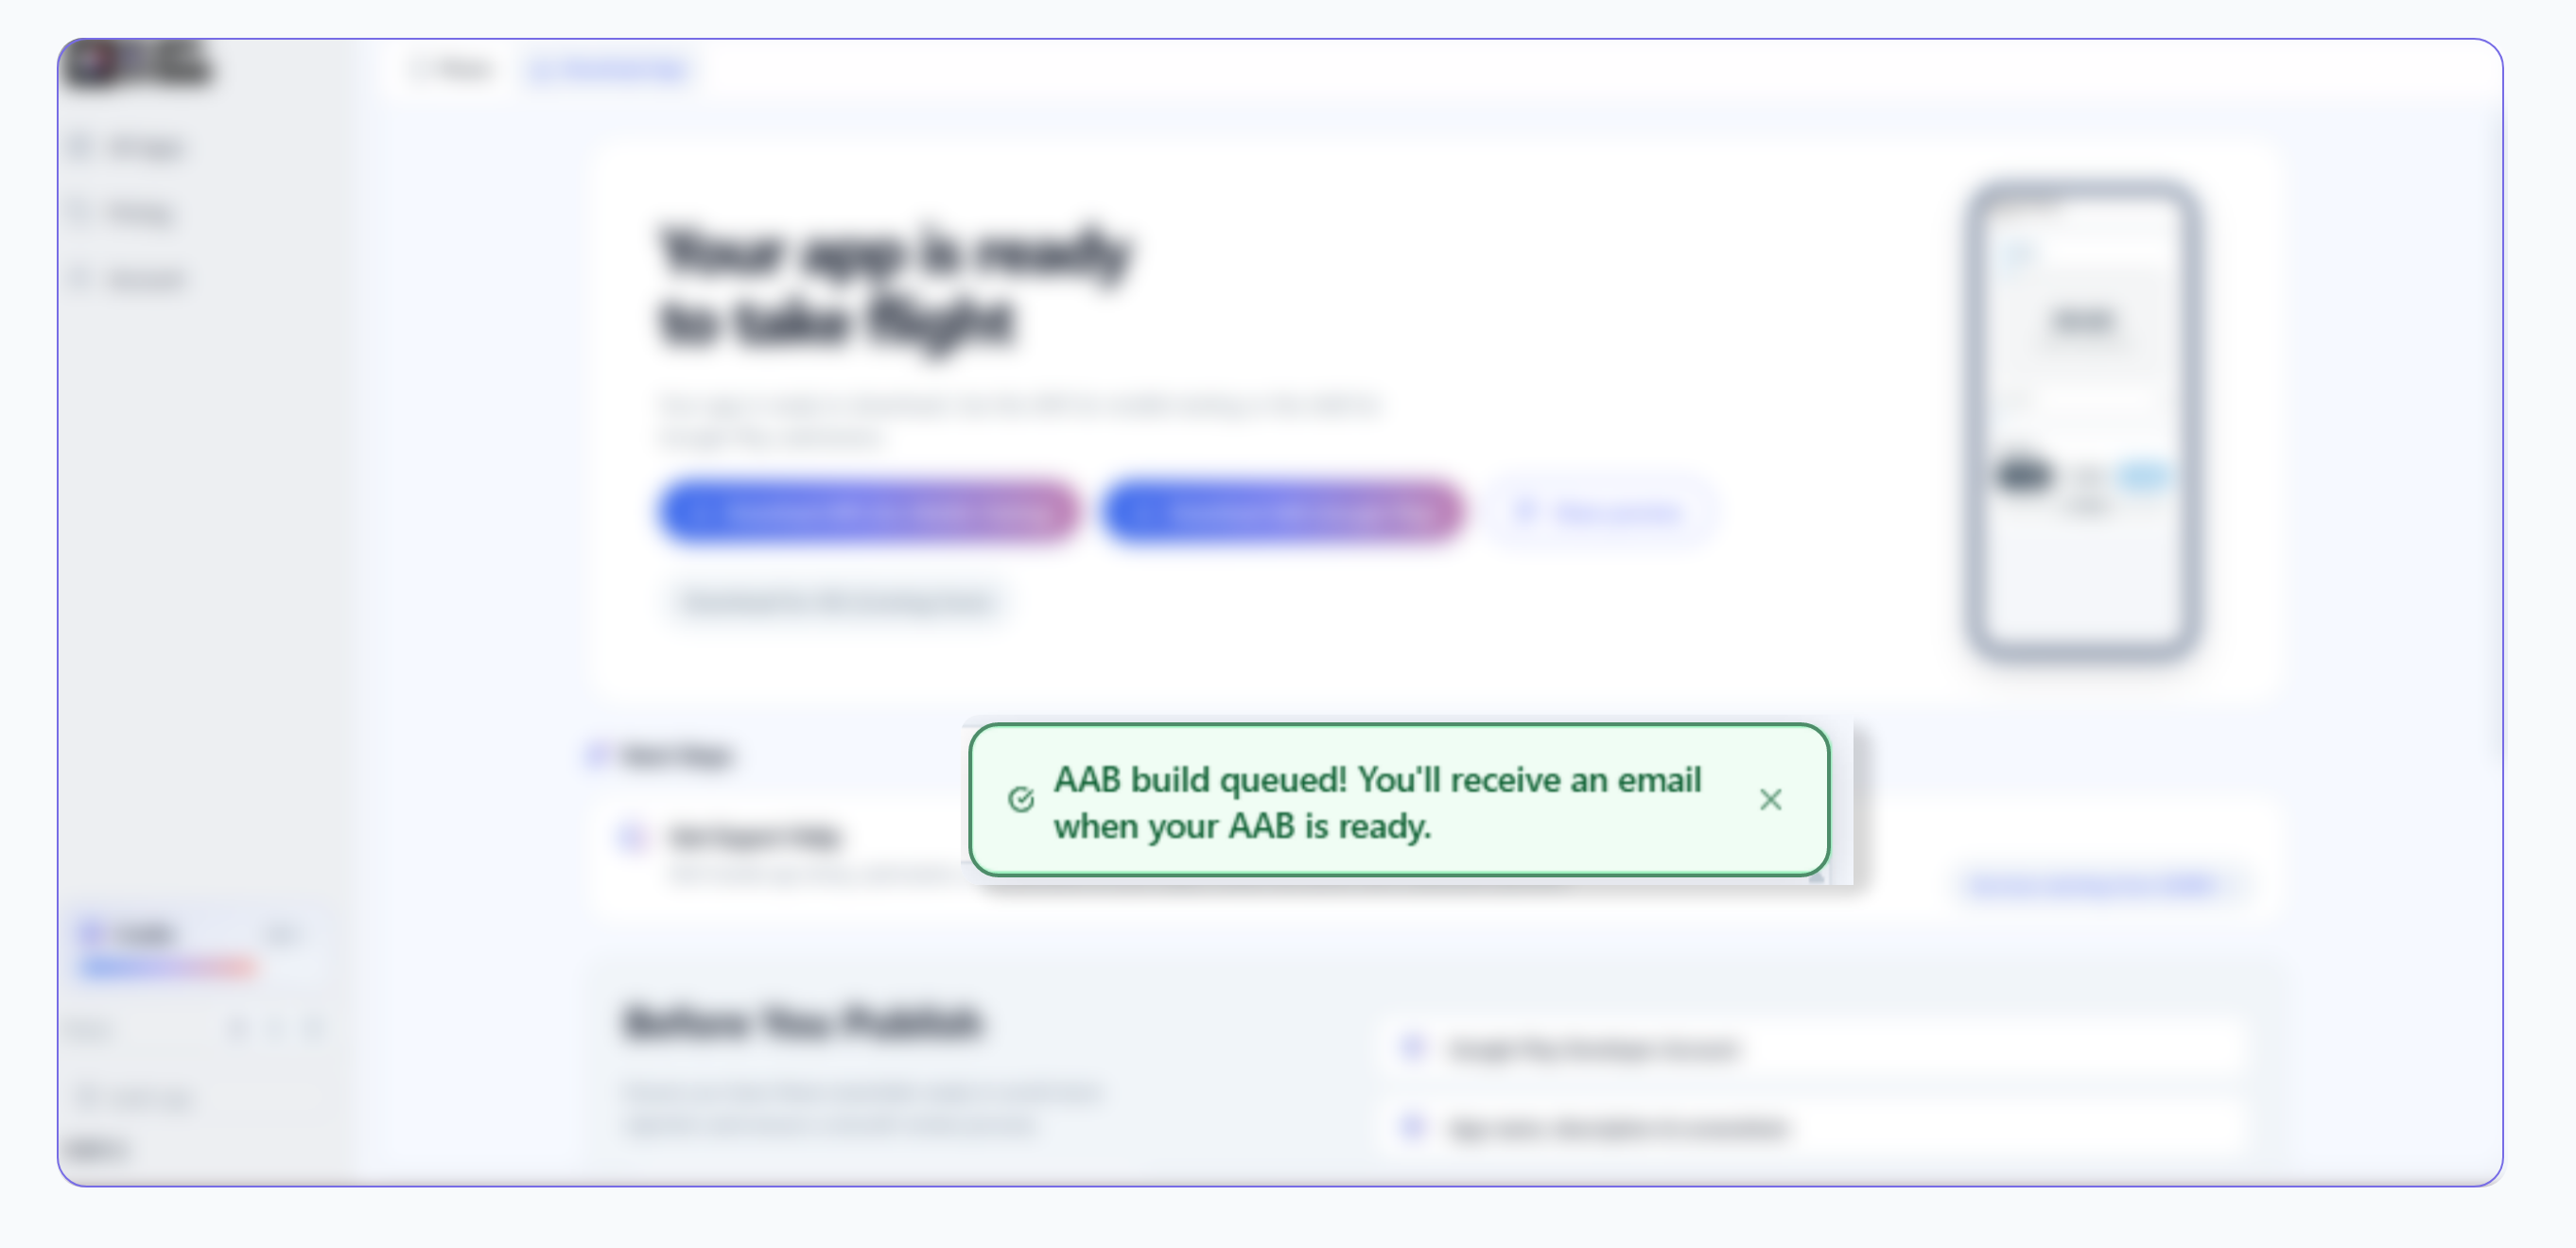 Download panel — Download AAB (Google Play) → Build Queued confirmation
Build times typically take 5–15 minutes. You will receive an email notification with a download link once the build is ready. You do not need to stay on the page.
AI Studio automatically manages your app's version number with every build. Each new build increments the version code — a strict requirement enforced by Google Play.
Once you receive the email, click the download link to save your .aab file to your computer. Keep this file — you will upload it to Google Play Console in Part 7.
Part 3 — Set Up Your App on Google Play Console
All steps in this section happen inside Google Play Console. For the latest official details on each step, refer to the Google Play Console Help Centre.
- Sign up for a Developer account — see Google Play docs: Create a Developer account.
- Sign in with your Google account.
- Choose your account type: Individual or Organisation (have your DUNS number ready if registering as an organisation).
- Accept the Developer Distribution Agreement.
- Pay the one-time $25 USD registration fee.
- Complete your account profile — include a valid contact email and phone number.
Account activation typically takes a few minutes but can take up to 48 hours in some cases.
- In Google Play Console, click "Create app" in the top-right corner.
- Fill in: App name, Default language, select "App", and choose Free or Paid.
- Note: once set to free, an app cannot be changed to paid later.
- Check the required declarations at the bottom and click "Create app".
- In the left sidebar, go to Release → Setup → App integrity.
- Under App signing key certificate, click "Choose signing key".
- Select "Use a different key" → "Export and upload a key from Java keystore".
- Paste the SHA-256 fingerprint you saved from Part 1, Step 3.
Google only needs your SHA-256 fingerprint. Paste it into the field provided.
Part 4 — Complete Your Store Listing
In the left sidebar, go to Grow → Store presence → Main store listing.
Select the category that best describes your app (e.g., Business, Education, Productivity, Lifestyle). Choosing the right category affects discoverability in the Play Store.
Google Play docs — Main store listing & categoryIf you need help creating these assets, the AI Studio Download section includes a "Need help with assets?" prompt. Our design team can generate compliant screenshots and branding assets for your listing.
Part 5 — Complete Policy & Content Requirements
Go to Policy → App content → Content rating, click "Start questionnaire", enter your email, select your app's category, and answer all questions honestly. Click "Submit" to receive your official rating.
Providing inaccurate content rating answers is a policy violation and can result in your app being removed. If your app's content changes significantly in a future update, retake the questionnaire.
Go to Policy → App content, under Privacy Policy, paste your publicly accessible Privacy Policy URL and click "Save".
Google Play docs — Privacy policy & User data policyGo to Policy → App content → Data safety and click "Start". Answer each question accurately covering:
- Data collection — Does your app collect any data?
- Data sharing — Is any data shared with third parties?
- Security practices — Is data encrypted in transit?
- Data deletion — Can users request deletion of their data?
Submitting the Data Safety form with incomplete or inaccurate answers is one of the most frequent reasons apps are rejected during review. Take time to answer each question carefully.
Go to Policy → App content → Target audience and select the age group your app is designed for.
If your app targets children under 13, additional requirements apply under the Families Policy, including restrictions on data collection and advertising.
Declare whether your app contains advertisements. Even if your app is free of ads today, this field must be completed.
Part 6 — Test Before Publishing (Recommended)
Before submitting to Production, Google Play provides testing tracks that allow you to share your app with a limited audience for feedback.
How to Set Up Internal Testing
- In the left sidebar, go to Release → Testing → Internal testing.
- Click "Create new release" and upload your
.aabfile. - Go to the Testers tab and add email addresses of your test team.
- Share the opt-in link with your testers.
Part 7 — Upload Your AAB and Submit for Review
- In the left sidebar, go to Release → Production.
- Click "Create new release".
- Under App bundles, click "Upload" and select the
.aabfile from Part 2.
Wait for the upload to complete. Google Play will analyse the bundle and display a summary including the version code and any detected issues.
Google Play docs — Prepare and roll out a releaseIn the "What's new in this release?" field, enter a brief description for users. For a first release:
"Initial release of [Your App Name]."
Click "Next" to proceed.
- Full rollout (100%) — Your app goes live to all users simultaneously once approved. Suitable for most first releases.
- Staged rollout — Release to a percentage of users first (e.g., 10%), monitor for issues, then gradually increase to 100%. Recommended if you have a large existing audience.
- Click "Review release".
- Google Play will display a checklist of warnings and errors:
- Errors (red) must be resolved before submission.
- Warnings (yellow) can usually be acknowledged and do not block submission.
- Once all errors are resolved, click "Start rollout to Production" and confirm.
What Happens After Submission
| Timeline | What to Expect |
|---|---|
| 1–3 days | Most first-time submissions are reviewed within this window |
| Up to 7 days | Reviews can take longer depending on app category or policy checks |
| Email notification | Google will email you when your app is approved or if action is required |
Once approved, your app will be live on the Google Play Store and discoverable by users worldwide.
Part 8 — Publishing Updates
Every time you make changes to your app in AI Studio and want to release an update, follow these steps.
- In AI Studio, open your app and go to the Download section.
- Open the download panel, select the version, and click "Download AAB (Google Play)" to queue a new bundle build.
- Wait for the email notification with your new
.aabdownload link.
AI Studio automatically increments the version code and version name with every build. This is a strict Google Play requirement and is handled for you automatically.
- In Google Play Console, open your app.
- Go to Release → Production → Create new release.
- Upload the new
.aabfile. - Update the release notes to describe what changed.
- Click "Review release" → "Start rollout to Production".
Update reviews typically complete within 1–3 days.
Frequently Asked Questions
Most first submissions are reviewed within 1–3 days. In some cases it can take up to 7 days, particularly for apps in regulated categories such as finance or healthcare.
Yes. A Google Play Developer account is required and costs a one-time $25 USD registration fee.
Only if you are registering as an organisation (company or business). Individual accounts do not require a DUNS number. If you need one, apply early — processing can take up to 30 days.
The fingerprint is displayed only once after keystore generation and cannot be retrieved from AI Studio. If you lose it, contact our support team immediately before attempting to publish.
Yes. AI Studio supports both web and Android builds independently. You can run both simultaneously.
Google will email you with the specific reason for rejection. Common reasons include an incomplete Data Safety form, a missing or inaccessible Privacy Policy URL, or a store listing that does not accurately represent the app's content. Address the flagged issue and resubmit.
Need Help?
If you run into any issues during the publishing process, our support team is here to help.
- In AI Studio: Use the "Contact Us" link in the Download section.
- Google's Official Help: Google Play Console Help Centre